JSX / 컴포넌트
- 컴포넌트는 html을 반환하는 함수. xml이나 html생겼지만 javascript 다.
- jsx는 리액트 컴포넌트다. 대문자로 시작한다.
커스텀 컴포넌트 생성
- 프로젝트 폴더
프로젝트명/src/컴포넌트파일명.js로 컴포넌트 파일 생성한다.
컴포넌트명 첫글자는 대문자로 작성하자.
예) 프로젝트폴더/src/First.js 생성
First.js
import React from 'react';   // 컴포넌트 생성시 무조건 써주자

function First() {  // 컴포넌트 명 앞은 대문자
  return (   // 반환 될 html을 작성
    <p>First text</p>
  );
}

export default First     //export 해주어야 jsx가 인식한다.
- 생성한 컴포넌트는 index.js 에서 렌더해야한다.
index.js
import Test from './First';  // 컴포넌트 import

ReactDOM.render(<First />, document.getElementById('testText'));
// First 컴포넌트를 id = testText 에 렌더한다.
프로젝트폴더/public/index.html에서 생성한 가상돔이 렌더 될 돔을 만들자
index.html
<div id="testText"></div>
- jsx에서 html의 class 속성은
className으로, label 태그의for속성은htmlFor등으로 작성해야한다. { }식 안에 3항 연산자{test ? 'true' : 'false'},{test && 'true'}작성 가능<br >,<input >등의 태그는 항상<br />,<input />이렇게 닫아줘야한다.- inline-style은 js형식으로 넣어줘야한다. ( js에서의 css는
-가 들어가는 속성명의 첫자를 대문자로 하면 된다.-mos,-webkit같은 벤더프리식스도 마찬가지 )
대충 이런 구조
컴포넌트를 2개 이상 렌더하고 싶은 경우
- First.js 처럼 Second.js 파일을 별도로 생성해도 된다.
Second.js
import React from 'react';

function Second() {
    return (
        <p>Second text</p>
    );
}

export default Second;
First.js
import React from 'react';
import Second from './Second';  //추가하고 싶은 컴포넌트 로드

function First() {
  return (
    <p>First text</p>
    <Second />    // 컴포넌트 추가
  );
}

export default First
First.js 에서 컴포넌트 로드를 저렇게 하면 될 것 같지만 안된다. JSX 의 규칙을 따라야한다.
컴포넌트 내부는 DOM 트리 구조 하나여야 함으로 p 태그를 감쌀 부모태그가 필요하다.
리액트 v16 이상에서는 Fragment 컴포넌트가 도입되어, div같은 부모태그로 감싸지 않아도 여러 요소를 렌더링 할 수 있게 되었다.
Fragment : https://ko.reactjs.org/docs/fragments.html
Fragments – React
A JavaScript library for building user interfaces
ko.reactjs.org
First.js
function First() {
  return (
      <div>  // 부모 태그 추가, 또는 Fragment 단축문법 <> 사용
        <p>First text</p>
        <Second />
    </div>
  );
}
위 처럼 작성하면 정상 로드
- First.js에 컴포넌트 함수를 별도로 생성해서 사용해도 된다.
First.js
import React from 'react';

function Third(){   // 세번째 컴포넌트 생성
    return <span>Third text</span>
}

function First() {
    return (
        <div>
            <p>first text</p>
            <Second />  // 컴포넌트 추가
            <Third />   // 컴포넌트 추가
        </div>
    );
}

export default First;
Props
- 컴포넌트에서
<컴포넌트명 속성명="값" />으로 해당 컴포넌트의 속성(properties)을 설정할 수 있다. - 값은 어떤 타입이라도 가능하다.
function Test() {
  return (
    <div>
      <PropTest propsString="text"
      propsBoolean={true}
      propsArray={["111", "222", "333"]} />
    </div>
  );
}
- 해당 컴포넌트(PropTest) 에서 JSX 내부의 { } 안에 속성명을 넣어 렌더링 할 수 있다.
function PropTest(props){
    console.log(props);
    return (
        <div>
        <span>{JSON.stringify(props)}</span>
    </div>
    );
}
- 컴포넌트 속성은 같은 이름으로 여러개의 값을 넣을수도 있다.
function PropTestSecond({color}){ // 인수 object.color 를 {color} 로 축약가능
  return (
    <div>
        <span>color : {color}</span>
    </div>
  );
}

function Test() {
  return (
    <div>
      <PropTestSecond color="red" />
      <PropTestSecond color="blue" />
      <PropTestSecond color="green" />
    </div>
  );
}<PropTestSecond color="red" />
<PropTestSecond color="blue" />
<PropTestSecond color="green" />
위 처럼 속성을 적다보면 비효율적인 코드를 생성할 수 밖에 없으니 javascript의 map을 활용해보자.
function PropTestSecond( {colorName} ){
  return (
    <div>
        <span>color : {colorName}</span>
    </div>
  );
}

const testArr = ["red", "blue", "green"];

function Test() {
  return (
    <div>
      {testArr.map(color => {
        return <PropTestSecond colorName={color} />
      })}
    </div>
  );
}
위 소스도 렌더는 되지만, 개발자 도구에서 경고메시지가 나온다.
리액트의 모든 엘리먼츠는 고유한 key값이 있어야한다... key값을 추가해주자.
function Test() {
  return (
    <div>
      {testArr.map( (color, idx) => {
        return <PropTestSecond colorName={color} key={idx} />
      })}
    </div>
  );
}
props 검증 : propTypes
- 컴포넌트의 필수 props를 지정하거나, props의 타입을 지정할 때 사용한다.
- propTypes의 사용은 필수가 아니지만 컴포넌트에 어떤 props가 필요한지 쉽게 알 수 있다.
설치
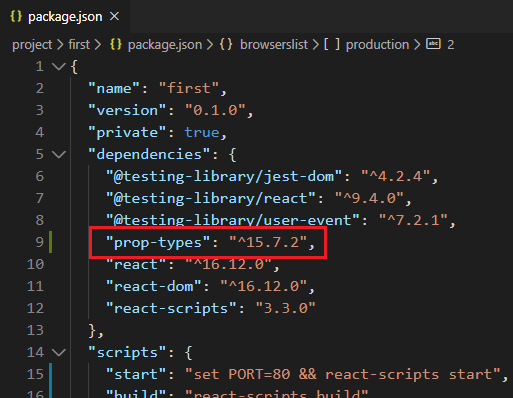
npm i prop-types
설치확인은 package.json에서 dependencies 확인
propTypes의 간단한 사용법을 알아보기 위해 객체타입 props를 생성해보자
const testObj = [{name : 'test111', val : 111, typeTest : 'type1'}, {name : 'test222', val : 222, typeTest : 'type2'}, {name : 'test333', val : 333, typeTest : 'type3'}];

function PropTestThird( props ){
  return (
      <span>testName : {props.testName}</span>
  );
}

function Test() {
  return (
      <>
      {testObj.map( fnTest => {
          return <PropTestThird testName={fnTest.name} key={fnTest.val} />
      })}
      </>
  );
}
위 상태에서 PropTestThird 컴포넌트의 props값을 설정해보자.
PropTestThird.propTypes = {   // 컴포넌트명.소문자 p로 시작하는 propTypes
  testName: PropTypes.string,  // 속성명 : 대문자 P로 시작하는 PropTypes.데이터 타입
  typeTest: PropTypes.string.isRequired  // isRequired는 props값이 사용되지않으면 오류를 낸다.
};
PropTestThird.propTypes 를 적용해보면 페이지 렌더에는 문제가 없지만
isRequired 로 설정 된 typeTest 라는 props가 사용되지 않았기 때문에 콘솔에 오류가 찍힌다.
function Test() {
  return (
      <>
      {testObj.map( fnTest => {
         return <PropTestThird
         testName={fnTest.name}
         key={fnTest.val}
         typeTest={fnTest.typeTest} />      //typeTest 속성 설정
      })}
      </>
  );
}
propTypes를 사용하면 데이터 타입이 제대로 넘어오는지,
필수 속성으로 설정된 값을 설정하지 않았는지, 속석명이 틀리진 않았는지 등을 체크해가며 개발 할 수 있다.
propTypes 가이드 을 보면 더 많은 설정 종류를 확인할 수 있다.
'Web > React' 카테고리의 다른 글
| [React] Styled-Components (0) | 2020.06.11 |
|---|---|
| [React] Hook, State (0) | 2020.06.11 |
| [React] create-react-app 작업 내용을 build 하기 (1) | 2019.07.16 |
| [React] Windows or CentOS7 / React + create-react-app + yarn + Node js 환경 구축 (0) | 2019.03.13 |


댓글